That First Sip Isn't Magic. It's Chemistry.
There's a moment, just after the first sip, when a really good espresso does something almost unfair to your senses. A brightness that cuts through, then a sweetness, then something earthy and rich that settles at the back of your throat. It's brief. It's beautiful. And if you've ever wondered what on earth is actually going on inside that little puck of ground coffee, you're in exactly the right place.
The good news is that espresso extraction isn't mysterious. It's chemistry. Brilliant, elegant, occasionally maddening chemistry. Once you understand the basic steps. What happens during espresso extraction, from the very first drop of water to the last? You'll never look at your morning shot quite the same way again.
This is your step-by-step guide. No jargon walls, no condescension. Just the honest science of what's happening inside your machine. Explained by someone who's spent quite a lot of time with both a chemistry textbook and a very good grinder.
A Quick Word on What "Extraction" Actually Means
Before we proceed with the step-by-step, it is helpful to understand what "extraction" means in a chemical sense. When hot water passes through ground coffee, it acts as a solvent, extracting the flavours and aromas from the coffee. It dissolves and carries away the soluble compounds locked inside each particle. This mix includes acids (which contribute brightness), sugars (for sweetness), melanoidins (which provide body, colour, and some bitterness), oils, and CO₂ gas.
Not everything in coffee grounds dissolves at the same rate. Acids and fruity compounds are extracted first. Sugars come next. Bitter, heavy ingredients tend to extract last, or not at all. So the goal of a good espresso shot isn't maximum extraction. It's optimal extraction. Pulling out the best of what's in there, and leaving the rough bits behind.
This is why “what happens during espresso extraction time” matters so profoundly. Too short, and your shot is sour and thin (under-extracted). Too long, and it becomes bitter and hollow (over-extracted). The sweet spot — typically 25–30 seconds for a standard shot — is where the magic lives.
With that in mind, let's walk through it, second by second.
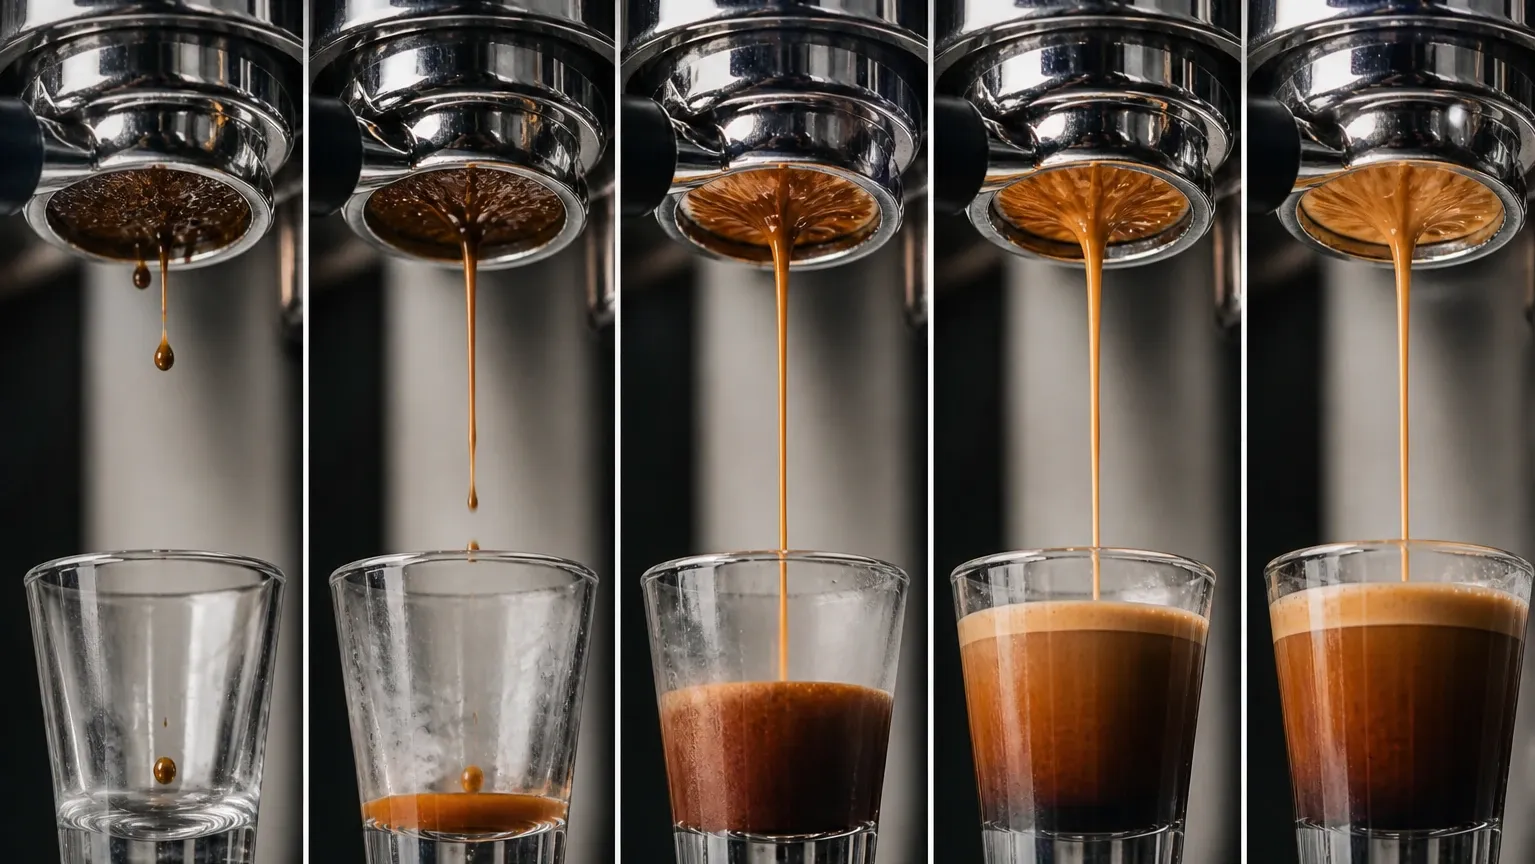
Step 1: Pre-Infusion — The Gentle Awakening (0–5 Seconds)
The shot has started. You've pressed the button. But for the first few seconds, something subtle and rather important is happening. Before extraction properly kicks off: pre-infusion.
Most modern espresso machines (and many manual lever machines) apply a short period of low-pressure water to the top of the coffee puck. Typically 2–4 bar, compared to the 9 bar used during extraction. This gentle soaking serves a few key purposes.
First, it begins to wet the coffee grounds evenly. Dry grounds are hydrophobic. They actually resist water initially. It sounds counterintuitive, but the cause of this is the lipid (oil) coating on coffee particles. A slow, low-pressure soak gives water time to penetrate uniformly.
Second, it allows CO₂ (which is present in freshly roasted coffee in significant quantities) to degas. If CO₂ isn't given this release, it can create channelling, where water takes the path of least resistance through the puck rather than flowing evenly through it. Channelling is one of the main reasons espresso shots go wrong.
Pre-infusion is especially valuable with very fresh coffee. If you've ever noticed that coffee roasted fewer than four or five days ago produces a particularly gassy bloom, this is the same principle at work. That's why some baristas rest their coffee for a few days before pulling shots.
Step 2: Pressure Ramp-Up and Flow Initiation (5–8 Seconds)
After pre-infusion, the machine ramps up to its full working pressure (typically 9 bar, which is nine times the atmospheric pressure). At this point, water is being forced through a portion of tightly packed coffee grounds (with considerable strength). The real extraction begins.
First, the most water-soluble compounds are dissolved. Those are the organic acids (such as citric, malic, and acetic acid), as well as the aromatic volatile molecules (responsible for those bright, fruity, and floral notes you sometimes catch on the nose). These compounds have a relatively low molecular weight and a high affinity for water, so they come out quickly.
This is also the phase where the pressure gradient across the coffee puck drives what chemists call "convective mass transfer". Essentially, it’s the forced movement of dissolved compounds from inside the coffee particles into the flowing water. The finer the grind, the greater the surface area, and the faster this transfer happens. This is why grind size has such a significant effect on shot taste. And what happens during espresso extraction time? Coarser grinds slow down the process, and finer grinds speed it up.
The flow rate during this phase should be steady and controlled. If it's too fast, water isn't spending enough time in contact with the grounds. Too slow, and you risk over-extracting bitter compounds later.
Step 3: The Heart of Extraction — Sugars, Sweetness, and Body (8–22 Seconds)
This is the heart of it. Roughly from seconds eight to twenty-two, the compounds most responsible for a genuinely "good" espresso are making their way from coffee ground to cup. Understanding this phase is the key to knowing what happens during espresso extraction shot after shot. And why consistency is so valuable.
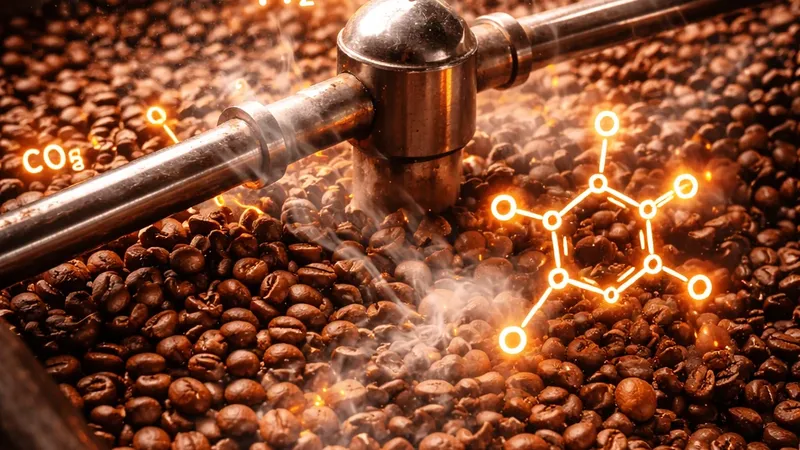
Maillard reaction products are among the stars here. During roasting, amino acids and reducing sugars react under heat to create hundreds of new flavour compounds. These are extracted mid-shot and contribute to the toasty, chocolatey, and nutty flavours. Those are the roasted notes that most people associate with espresso.
Caramelised sugars add sweetness and roundness. Despite what you might assume, espresso is not sweet because baristas have added anything to it. It tastes sugary-sweet when the sugars in the coffee extract are balanced with the acids. This balance is delicate. Even a few seconds' difference in extraction time can shift a shot from bright and sweet to flat.
Melanoidins — large, brown polymeric molecules also formed during roasting. They give espresso its characteristic body and colour. Besides, it contributes to the thick, viscous texture that makes espresso taste so different from filter coffee. They're also responsible for some of the bitterness in the finish, which is perfectly pleasant in the right quantities.
If your shot tastes right in this window, you're on the right track.
Step 4: The Tail End — When to Stop (22–30 Seconds)
Here's where many shots go wrong, and where the science becomes especially practical.
As extraction progresses, the easily dissolving compounds have already made it into your cup. What remains in the coffee grounds is larger. More complex molecules (particularly phenolic compounds and certain caffeine derivatives) require more energy and time to extract. Those are the compounds associated with harsh bitterness, dryness, and unpleasant astringency. It makes your mouth feel a bit like sandpaper.
After about 22–25 seconds, the concentration of these compounds in the extracted liquid begins to rise sharply. This is why most speciality baristas aim to stop their shots before 30–32 seconds (measured from the moment water first hits the puck). The "what happens during espresso extraction time?" question has a very practical answer here. Every second past the sweet spot carries a diminishing and eventually negative return.
You'll know you've gone too long when the espresso tastes hollow, drying, or has a bitterness that lingers uncomfortably. Conversely, a short shot (under 20 seconds) will often taste sharp, thin, and almost vinegary. The acids have dominated because the sweetness never had time to develop.
The goal is a shot where the acids, sugars, and roasted compounds are all present, in conversation with each other. Not a single voice is heard but the choir.
What Happens During Espresso Extraction - Overview
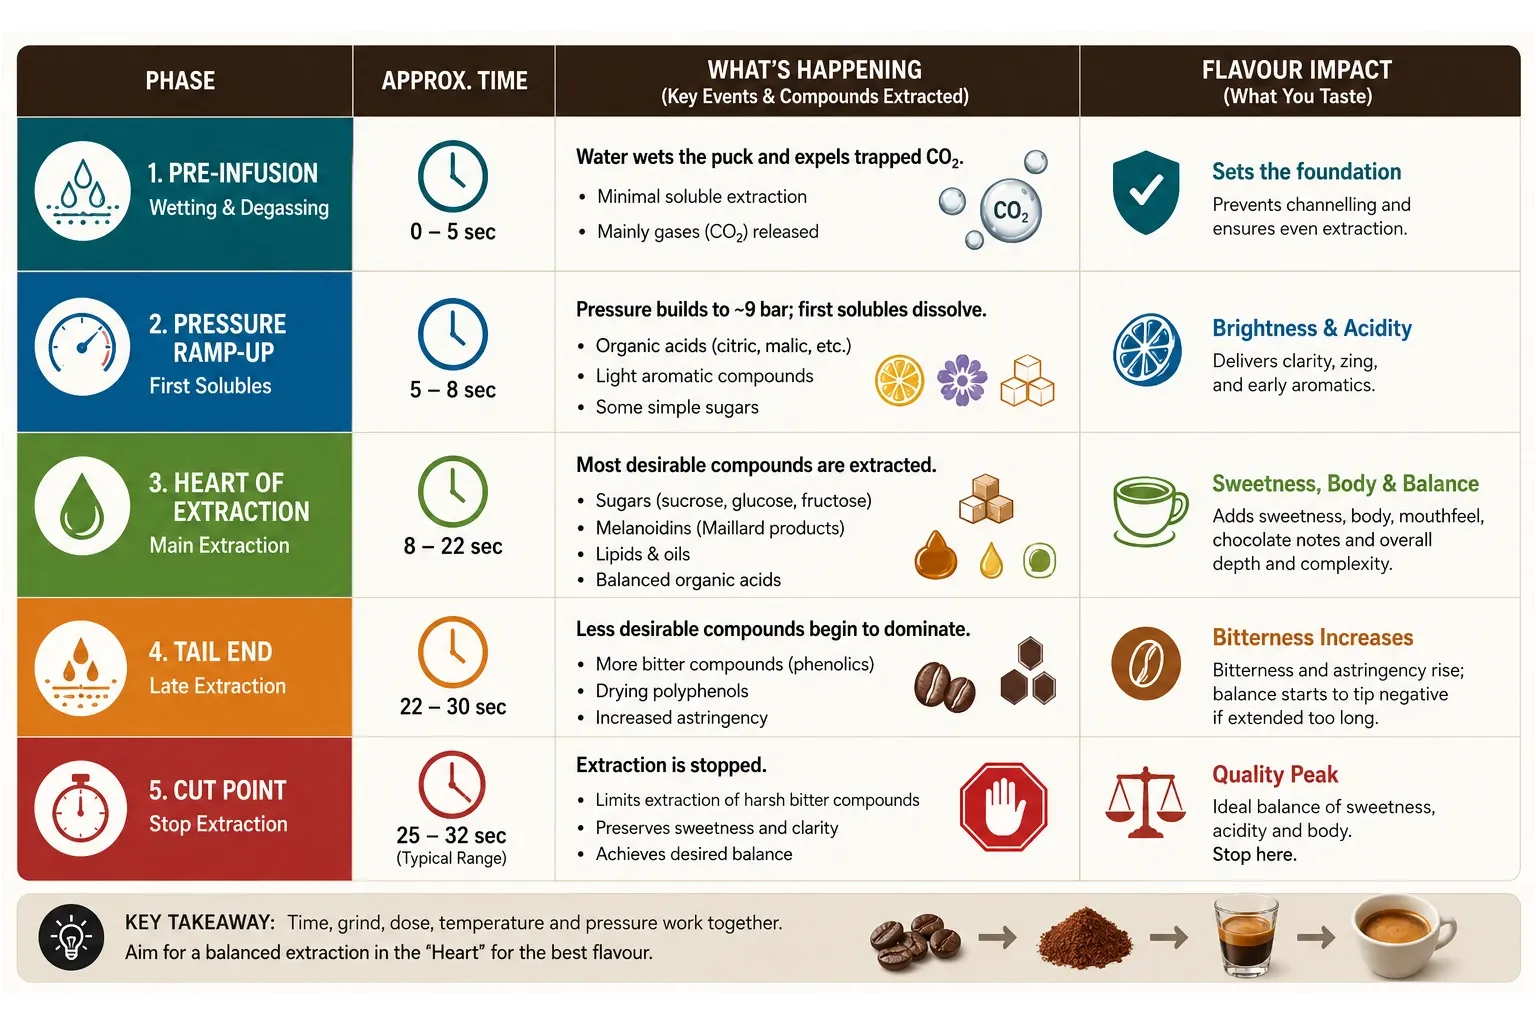
Here's a summary that you can use whenever you need it. Think of this as your personal "what happens during espresso extraction chart". The kind of reference that turns abstract chemistry into something you can actually use.
| Phase | Approx. Time | What's Happening | Flavour Impact |
|---|---|---|---|
| Pre-infusion | 0–5 sec | Water wets the puck; CO₂ degasses | Prevents channelling; sets up even extraction |
| Pressure ramp-up | 5–8 sec | Full 9-bar pressure builds; first solubles dissolve | Brightness, acidity, early aromatics |
| Heart of extraction | 8–22 sec | Sugars, melanoidins, Maillard products extract | Sweetness, body, chocolate, depth |
| Tail end | 22–30 sec | Remaining solubles; phenolics begin to dominate | Balance tips toward bitterness if extended |
| Cut point | 25–32 sec | Extraction stops | Quality peak — stop here |
A few things to note about this chart. The timings are guides, not laws. Grind size, dose, basket size, water temperature, and even altitude can all shift these windows. A finer grind compresses the timeline, and a coarser grind stretches it. What remains constant is the" sequence" The chemistry always happens in this order, even if the clock looks slightly different from one step to the next.
What This Means For Your Coffee Brewing at Home
Right. So what do you actually do with all this?
When your espresso tastes sour or sharp.
You are likely under-extracting. The acids have come through, but the sugars haven't had time to follow. Try grinding slightly finer (this increases surface area and slows the flow rate, giving water more contact time). Or extend your extraction time by a second or two.
When your espresso tastes bitter and hollow.
You're probably over-extracting. The shot has run too long, or the grind is too fine. The harsher phenolic compounds have dominated. Try a slightly coarser grind, or keep a closer eye on your extraction time.
When it tastes flat and lacks brightness.
Your coffee may be too old, or your water temperature too low (below about 90°C, extraction slows significantly for aromatic compounds). Fresh coffee and correctly heated water make a huge difference.
Trust your palate.
The chemistry provides you with a framework, but your taste buds are the final judge. If a shot at 27 seconds tastes brilliant to you — that's the answer. The science doesn't override your senses; it explains them.
One last practical note. If you're serious about improving your espresso at home, a set of digital scales (to measure your dose and yield) and a simple stopwatch will tell you more about what's happening in your cup than almost any other tool. Measuring what happens during espresso extraction time isn't obsessive — it's just paying attention.
The Crema Question: What Is It, and Does It Matter?
The guide to espresso extraction would not be complete without addressing the crema. That golden, foamy layer sitting on top of your shot. This looks so satisfying that it is often photographed.
Crema is formed during extraction when CO₂ gas (released from the coffee under pressure) is forced into the water and stabilised by two things. The oils (lipids) in coffee act as surfactants and help the bubbles maintain their shape. The melanoidins we met earlier, which give the foam its characteristic brown colour and some viscosity.
Here's the honest chemistry. Crema is not a reliable indicator of quality. Fresh, CO₂-rich coffee produces abundant crema almost regardless of how well the shot has extracted. A beautifully balanced shot from a coffee roasted three weeks ago might have a thinner crema than a mediocre shot from beans roasted last Thursday.
What crema can tell you is whether your coffee is very fresh (lots of foam, possibly quite gassy) or older (thinner, more persistent foam that lasts longer in the cup). It can also indicate channelling. If the crema has a white or very pale streak through it, water may have found a short path through your puck.
A beautiful crema is a pleasure. But taste the shot. The crema is the cover; the story is underneath.
Conclusion: Science Doesn't Make Espresso Less Beautiful.
If you've made it this far, you now have a genuinely solid understanding of what happens during espresso extraction. From the first quiet seconds of pre-infusion to the final decision of when to cut the shot.
And here's what I hope you take from it. Knowing the chemistry doesn't make espresso more complicated. It makes it more interesting. Every shot you pull is a small experiment. Every adjustment you make to grind size or extraction time is a hypothesis. Every sip is the result.
The compounds dissolving into your cup don't care whether you understand them or not. They're going to do their thing regardless. But when you know what they are and roughly when they arrive, you become a more attentive brewer. You start to notice what "sour" actually tells you. You understand why resting your beans for a few days changes the texture of the crema. You recognise the particular brightness of a perfectly timed shot.
Espresso has always been remarkable. Now you know why.
This article is for informational and educational purposes only and does not constitute medical or professional advice. Please read our full Disclaimer for more information.
Frequently Asked Questions
The moment 93°C water touches your coffee bed, it triggers a cascade of chemistry. First, CO₂ trapped in freshly roasted cells bursts out. That's your crema forming. Then water dissolves acids, sugars, and lipids in a strict sequence. Chlorogenic acids are extracted within seconds, followed by sweetness-carrying sucrose derivatives, then bitter melanoidins later. Get the timing wrong, and you're either sour (under) or harsh (over). The whole shot takes roughly 25–30 seconds. Remarkable, really.
Melanoidins — those large, brown compounds created during roasting — are stubborn. They need time and pressure to dissolve, so they arrive late in the extraction. Pull your shot past 35 seconds, and they dominate, drowning out the fruity acids and caramel sweetness that were extracted earlier. Think of it like steeping tea too long. A 28-second Kenyan light roast might taste of blackcurrant. Push it to 40 seconds, and suddenly it's all bitter bark. Timing genuinely matters.
Nine bars of pressure isn't arbitrary. It's the sweet spot for forcing water through a compacted coffee puck without channelling. At this pressure, water emulsifies coffee oils into tiny droplets suspended in the liquid, creating body and mouthfeel you simply can't get from a filter. Drop to five bars and extraction becomes uneven. Oils don't emulsify properly, and you lose that velvety texture. It's essentially the same principle as a homogeniser in a dairy. Pressure creates uniformity and structure.
Channelling happens when water finds a weak spot in your puck — a crack, uneven tamp, or clump — and blasts through it rather than flowing evenly. That narrow channel over-extracts wildly (think bitter, scorched flavour) while the rest of the puck barely extracts at all, leaving you with a muddled, unbalanced shot. Using a distribution tool before tamping (like a Weiss Distribution Technique (WDT) needle) physically breaks up clumps and dramatically reduces channelling. Proper prep makes a proper espresso.
Fresh roasted beans (say, roasted three days ago) are still off-gassing significant CO₂ from the Maillard and caramelisation reactions during roasting. When you pull that as espresso, excessive gas disrupts water contact with the coffee solids. It causes uneven, chaotic extraction. You'll get a huge, unstable crema that collapses quickly and a sour, underdeveloped flavour. Most speciality roasters recommend resting espresso beans 7–14 days post-roast. A bit counterintuitive, but fresher genuinely isn't always better here.